
6 Tie Dye Patterns Ranked by Difficulty (From Easiest to Hardest) - PRACTICAL & PRETTY
If you're curious about trying tie dye and wondering where to start, this friendly guide takes you through six popular tie dye patterns—from the easiest to the most challenging! Whether you're brand new or ready for an upgrade, you'll find clear steps, helpful tips, and insider advice (with awesome quotes!) to help you pick the right pattern and avoid overwhelm.
1. Quick Difficulty Overview
Before we jump into the details, here's a handy overview of the six tie dye patterns and how tricky each one is:
- Crumple: Very Easy
- Spiral: Easy-Medium
- Fan Fold: Medium
- Deity Roll: Medium-Hard
- Geode: Hard
- Glitch: Hardest
This ranking helps you spot which designs might be best for beginners and which are best tackled once you're feeling more confident! 😎
2. Crumple (Easiest)
Why it's ranked #1: The crumple is as simple as it gets—you just scrunch up your shirt! There's no need to measure or fold precisely, and you don't need any special tools. Plus, the results are always unique and beautiful.
"You literally scrunch up a shirt. There's no precise folding, no special tools, and the results are always gorgeous."
How to do a crumple:
- Step 1: Take your damp, soda-ash-soaked shirt and gather it into a ball by scrunching it up randomly.
- Step 2: Secure the scrunched shirt with rubber bands or sinew.
- Step 3: Apply your choice of dye—just go wild!
Crumple Tips:
- Try folding your shirt in half before scrunching for a more balanced look.
- Putting the darkest dye on the bottom adds dimension.
- Using ice over the crumpled shirt can lead to "really fun and unexpected" results!
"The crumple is a great starting point for beginners because you can't really mess it up. Every crumple is one of a kind."
3. Spiral (Easy-Medium)
Why it's ranked #2: The spiral is easy for beginners, but can also get fancier as you get better. Mastering how tight and even your coil is makes all the difference!
"A spiral is technically beginner-friendly, but it can get as precise and complex as you want it to be. That range is why it's not in the #1 spot."
How to do a Spiral:
- Lay your shirt flat and pinch where you want the center of the spiral to be (usually near the belly button area).
- Twist the fabric around that center point until the shirt forms a coiled disc.
- Use rubber bands or painters tape to hold it together and divide the disc into sections.
- Apply your dyes, making each section a different color if you like.
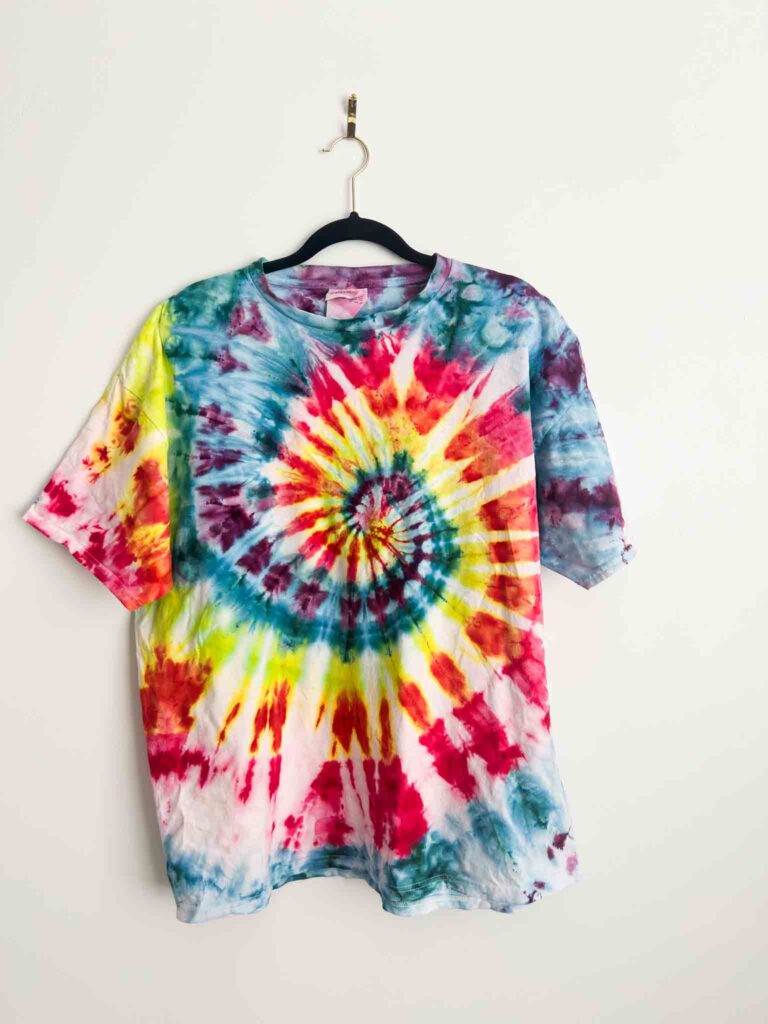
Extra Tips:
- Painters tape can be easier and less messy than rubber bands—go with what feels right!
- For bleach-based "reverse tie dye," rubber bands are best as they resist bleach better.
"The spiral is forgiving at a basic level, but people spend a lot of time perfecting their spirals. The tighter and more even your coil, the cleaner your result."
4. Fan Fold (Medium)
Why it's ranked #3: The actual folding is a breeze, but it does require a little more setup—like elevating your shirt in a "gutter" so the dye flows the right way.
"The fold itself is not difficult, but the setup requires a little more planning than a crumple or a spiral."
How to do a Fan Fold:
- Accordion-fold your shirt in one direction, creating even pleats (think paper fan). For a more complex pattern, rotate and fold it the other way too (double fan fold).
- Secure with rubber bands or sinew.
- Elevate the bundle in something that will let the dye drain through the folds (a piece of folded cardboard is great).
- Drip or pour dye over the shirt and let gravity do the rest!

"A fan fold typically benefits from a gravity setup, meaning you want the dye to flow downward through the layers. Laying it flat will give you different results."
Single vs. Double Fan Fold:
- Single: Parallel lines.
- Double: Grid-like pattern—super eye-catching!
- Folding from the bottom up creates a new look.
5. Deity Roll (Medium-Hard)
Why it's ranked #4: Deity rolls look simple but take some practice to get right—they involve rolling the shirt twice and wrapping the rolls together.
"It looks simple, but there's nuance to it. A deity roll is basically a spiral roll done twice, with the two rolls wrapped around each other. The wrapping is where people get tripped up."
How to do a Deity Roll:
- Roll the shirt tightly from one end to make a neat tube.
- Roll it again from the opposite end to create a second roll.
- Wrap the two rolls together, securing with bands or sinew.
- Elevate in a gutter for the best dye effect.
Pro Tips:
- "Keep your rolls tight and even. Loose rolls result in muddy, undefined lines."
- Keeping tension even helps the final shape stay compact.
"Once you get the hang of it, deity rolls come together quickly and the results are really distinctive."
Don't worry if your first try looks wild—practice makes perfect!
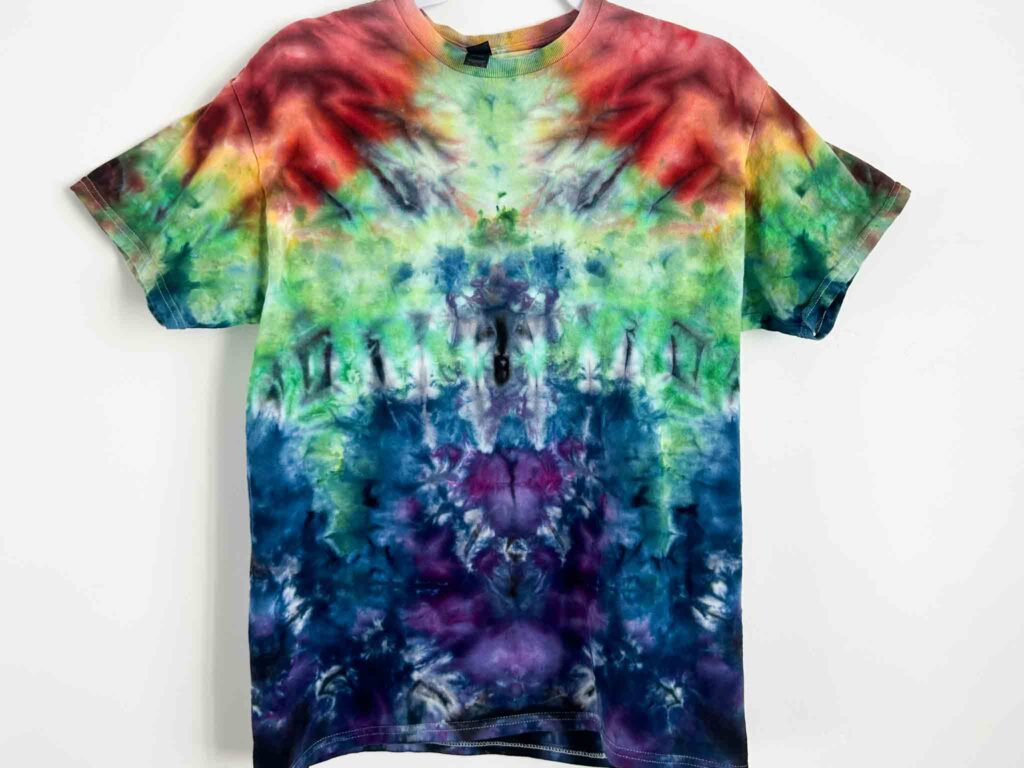
6. Geode (Hard)
Why it's ranked #5: Geodes can look incredible, but they're tough to master at first. It's totally normal if your first one isn't perfect!
"Geodes are not impossibly difficult, but they take practice to get right. Your first geode is probably not going to look like the ones you see on Pinterest, and that's completely normal."
How to do a Geode Fold:
- Scrunch your shirt into a ball, making sure to create lots of "nodules" (small, tight bunches).
- Wrap each nodule and the clusters between them at random with sinew to make different shapes.
- Apply dye to the outside and between the wrapped sections.

Geode Tips:
- "The nodules need variety. If your nodules are all the same size and neatly wrapped, they'll look like concentric circles instead of a geode."
- Watch multiple video tutorials and experiment with different fabrics and dye methods.
7. Glitch (Hardest)
Why it's ranked #6: The glitch fold isn't super complex, but it's slow and requires patience for all the careful folding and measuring.
"This is the most time-intensive fold on the list. The technique itself is not complicated, but the execution is slow and requires patience, which is honestly the hardest part for a lot of people (myself included)."
How to do a Glitch Fold:
- Make precise horizontal and vertical pleats, measuring with a ruler for best results (use at least an 18-inch ruler).
- Accordion-fold this pleated shirt.
- Secure it—sinew works great here, often loosely wrapped.
- Apply dye.
Glitch Reality Check:
- "A geode takes me about 5 minutes to tie up. A glitch takes me about 20 minutes."
- The payoff? "The finished result of a glitch fold is unlike anything else. Even with just two colors, the geometric patterning is stunning."
8. What to Try First
If you're just starting out:
- Begin with a crumple (it's almost impossible to mess up).
- Next, move on to the spiral—try a few and have fun experimenting!
- Once you're comfortable, try the fan fold.
- After those, why not attempt a deity roll, geode, or glitch? They all lead to jaw-dropping results once you get the hang of them.
"If you're brand new to tie dye patterns, start with a crumple. Make a few… Then move on to a spiral. Once you're feeling confident with those two, try a fan fold. From there, the sky is the limit."
To see finished samples and more detailed tutorials, visit the creator's Etsy shop and YouTube channel!
9. Shop Supplies
Here are the recommended supplies for all these tie dye patterns:
- Fiber reactive dyes: Amazon storefront
- Sinew (for geodes and glitch folds): Amazon storefront
- Jacquard dyes (discount code ANNA): Amazon storefront
Final Thoughts
Whether you're after something quick and easy or ready to invest time in a showstopper, there's a tie dye pattern on this list for you! Start with the basics, enjoy the colorful process, and don't stress about getting it "perfect"—each piece is its own kind of magic. If you have questions or want to share your creations, the author welcomes you to connect via Instagram or TikTok. Happy dyeing! 🌈
Need a summary like this?
Get instant summaries with Harvest